Workflow from Sign up to finish
Sign up flow
- Creator recruitment page. Enter your mail address and send a Sign up email.
- An email will be sent from JIDEN to the email address you entered. Click the URL of the email.
- Enter the required information on the creators (writers/photo movie editors) Sign up form.
- After completing the input Creator login page, you will be able to log in. Please enter your email address and password to log in.
- When you log in for the first time, please enter your personal information on the additional Sign up information entry page.
- Based on the Sign up details, the operating company will review the Sign up.
- After passing the examination, we will conclude the contract online.
- After concluding the contract, enter your introduction text, your preferred content, etc.
- When all the entries are completed, your profile can be published and displayed in the creator list.
Workflow
- When you receive a consultation from a user, you will receive a notification on My Page, so please check the site regularly.
- If the story goes ahead, or if you make a reservation directly, you will be notified of the reservation.
- When the reservation is notified, and the user's payment is completed, the order will be confirmed.
- Once the order is confirmed, we will interact with the user, including the information needed to create an autobiography.
- Once you have all the materials, first create a text autobiography or photo movie autobiography on your own PC.
- When the autobiography is complete, upload it to the requester's screen for confirmation.
- If you contact us about the correction, we will correct it, upload it again, and repeat the confirmation.
- When the project is completed and the requesting user says "work completed", the task is completed.
- As soon as the work is signed off, we will proceed to the payment phase. At the end of the month when the work is completed, the money will be deposited to the registered account on the 15th of the following month.
How to Make Your Autobiography
How to create a text autobiography (created from the JIDEN system)
How to create a text autobiography (created from the JIDEN system)
- To create a text autobiography (created from the JIDEN system), enter the "headline", "text", and "image" for each chapter.
1. Chapter title: Enter the subheading for the chapter.
2. Subheading: Enter the subheading for the chapter.
3. Body: Enter the autobiographical body text that corresponds to the subheading.
4. Image: You can select the image to be displayed after the text. You can also enter a caption for the image.
5. Add headline text button: By pressing the button, you can increase the set of subheading + body + image (the part where the background is gray).
6. Chapter add button: Chapter add button: With the push of a button, you can add the next chapter.
* The maximum number of words for the entire autobiography you write is around 6000.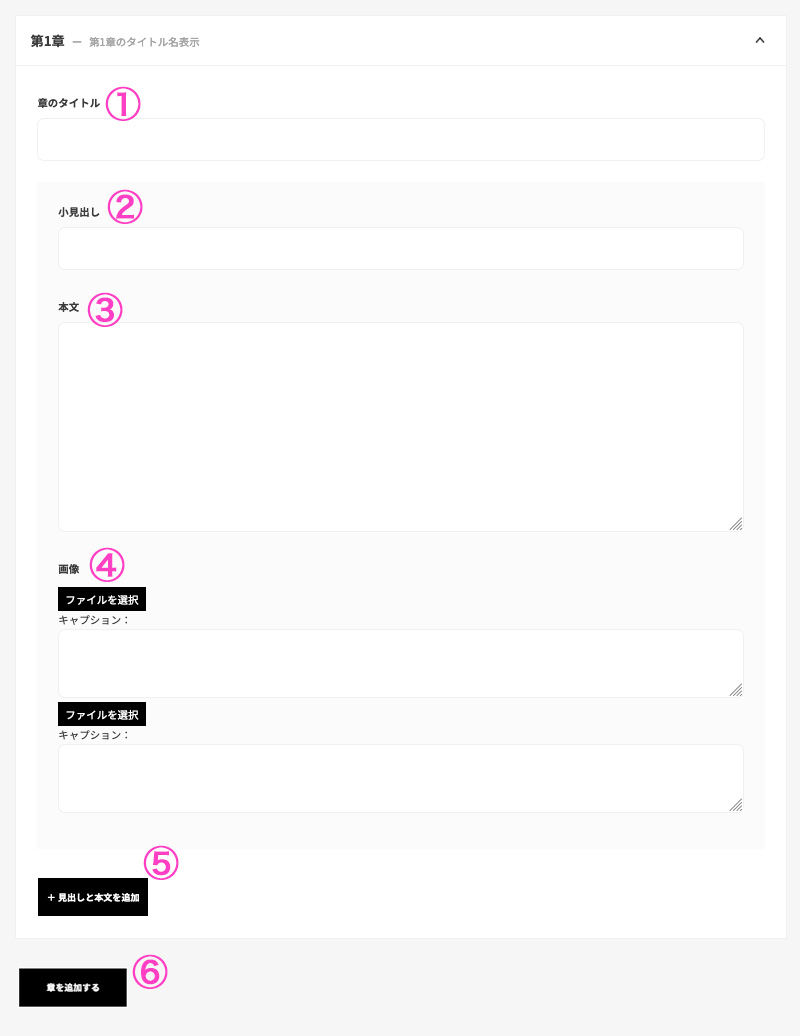
- Then select "My Photo for Ending". If you select "My Photo for Ending", My Photo will be posted at the end of the autobiography.
* The selection of "My Photo for ending" is only available for autobiographies written by yourself using the JIDEN system.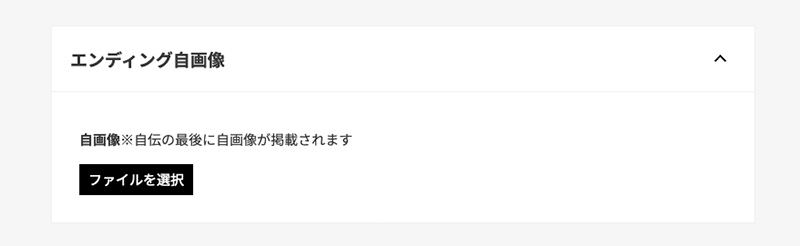
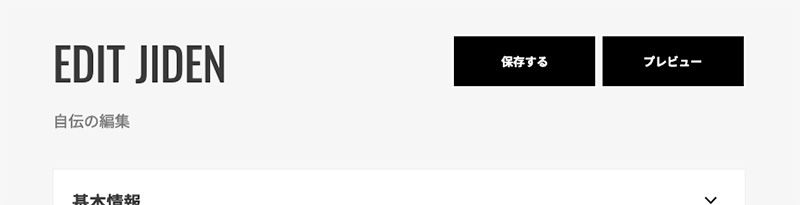
- After completing your input, click the "Preview" button to preview your autobiography. If you are satisfied with the entered contents, "Save" and you are done.
How to create a text autobiography (upload a text autobiography)
Upload and create a text autobiography
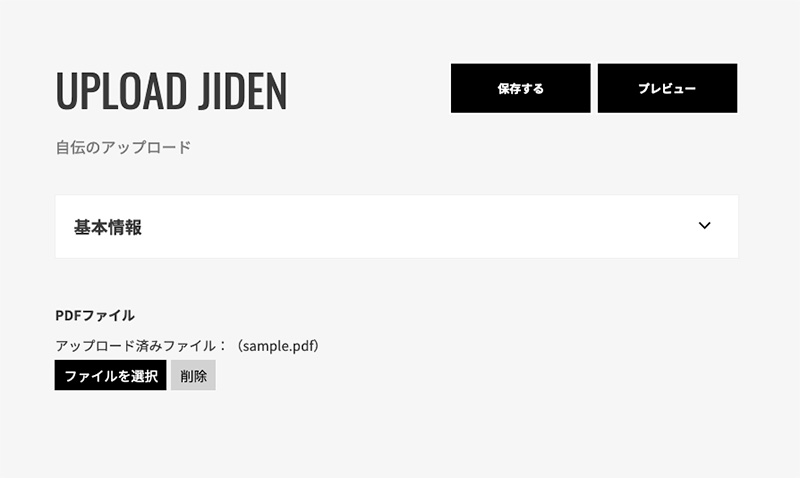
- When uploading and creating a text autobiography, first prepare a PDF file of the autobiography to be uploaded on your PC.
* PDF files are the only format that can be uploaded. - Upload and proceed to the creation screen. Upload the PDF file by either method.
1. Drop and upload: Drag and drop the file to be uploaded into the frame to upload it.
2. Select and upload: Press the button and select the file you want to upload.
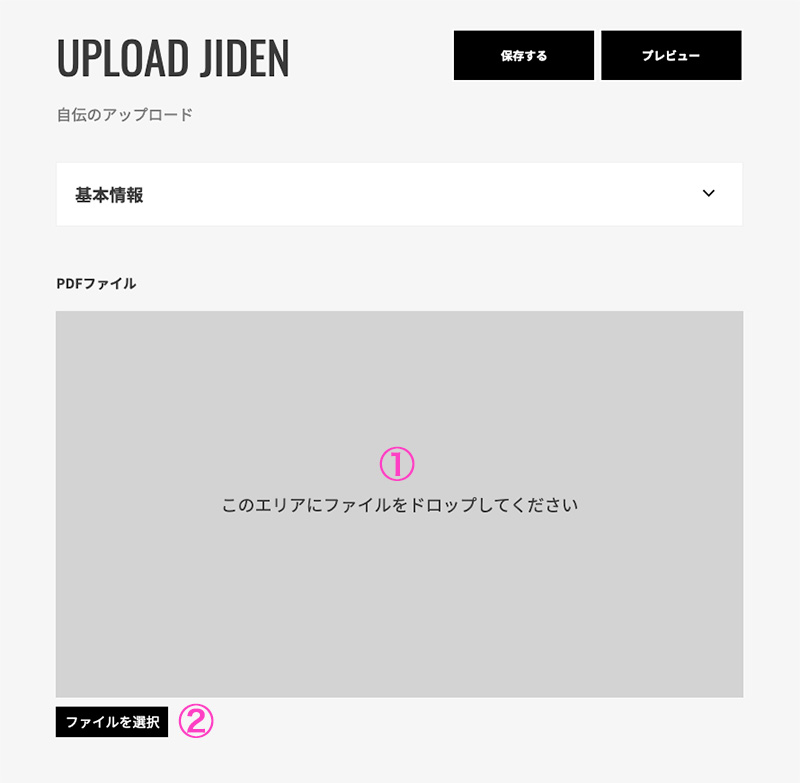
- When the upload is complete, you preview your autobiography by clicking the "Preview" button. If you are satisfied with the entered contents, "Save" and you are done.
How to create a photo movie autobiography (upload a photo movie autobiography)
Upload and create a photo movie autobiography
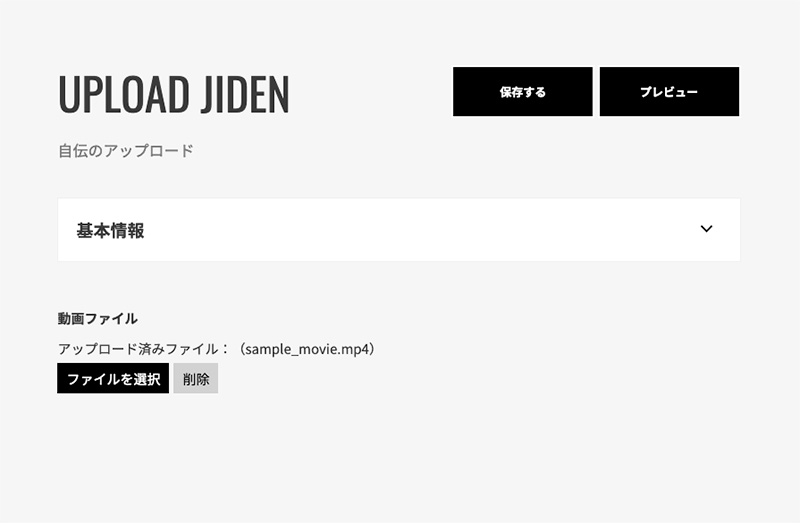
- When uploading and creating a photo movie autobiography, first prepare a video file of the autobiography to be uploaded on your PC.
* Only MP4 files can be uploaded to your photo movie autobiography. - Upload and proceed to the creation screen Upload the MP4 file by either method.
1. Drop and upload: Drag and drop the file to be uploaded into the frame to upload it.
2. Select and upload: Press the button and select the file you want to upload.
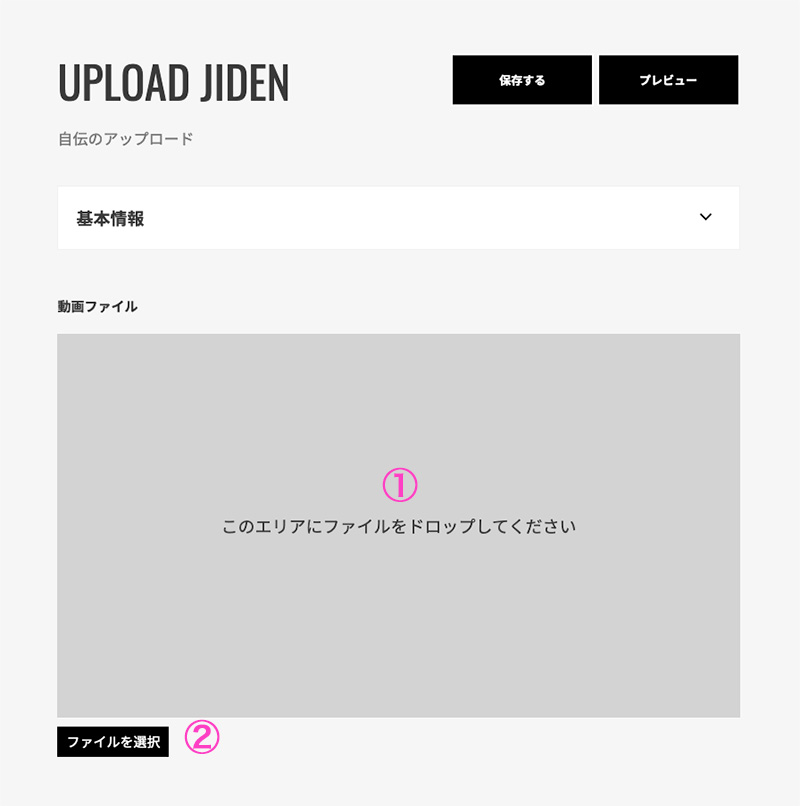
- When the upload is complete, you can preview your autobiography by clicking the "Preview" button.
If you are satisfied with the entered contents, "Save" and you are done.